- Author: Aqsa Khan
Date: Aug 7, 2025 - Category : 2D Animation, Animation Studios


Ever hit play on a YouTube video and immediately thought, “Wow, this looks professional”? Or maybe you’ve been scrolling and seen a captivating animation pop up, instantly making you curious about the video. That polished, branded look? It often starts with an incredible animated intro and outro.
You might already have great content, eye-catching thumbnails, and solid editing—but something still feels… incomplete. That’s because the finishing touch, the visual signature that ties everything together, is often missing: a strong, animated intro and outro that sets the tone and leaves a lasting impression.
In this guide, we’ll break down exactly how to create an animated YouTube intro/outro that’s attention-grabbing, even if you’re not a motion graphics pro.
Before using Canva or any other image maker, take a step back and establish the identity of your brand. Great YouTube intros and outs are based on character and purpose rather than trends.
Ask yourself:
Think of your intro as a handshake; it has to be a strong opening statement, able to present who you are and the tone with which you approach your story. In the same sense, your outro is the clean exit, where you give your audience that extra incentive to like, subscribe, or watch additional videos.
Thinking twice about animation for your brand? Check out our blog on: 5 compelling reasons to invest in animated videos
88% of video marketers say video has helped increase user understanding of their product or service, and intros/outros play a key role in setting tone and identity.
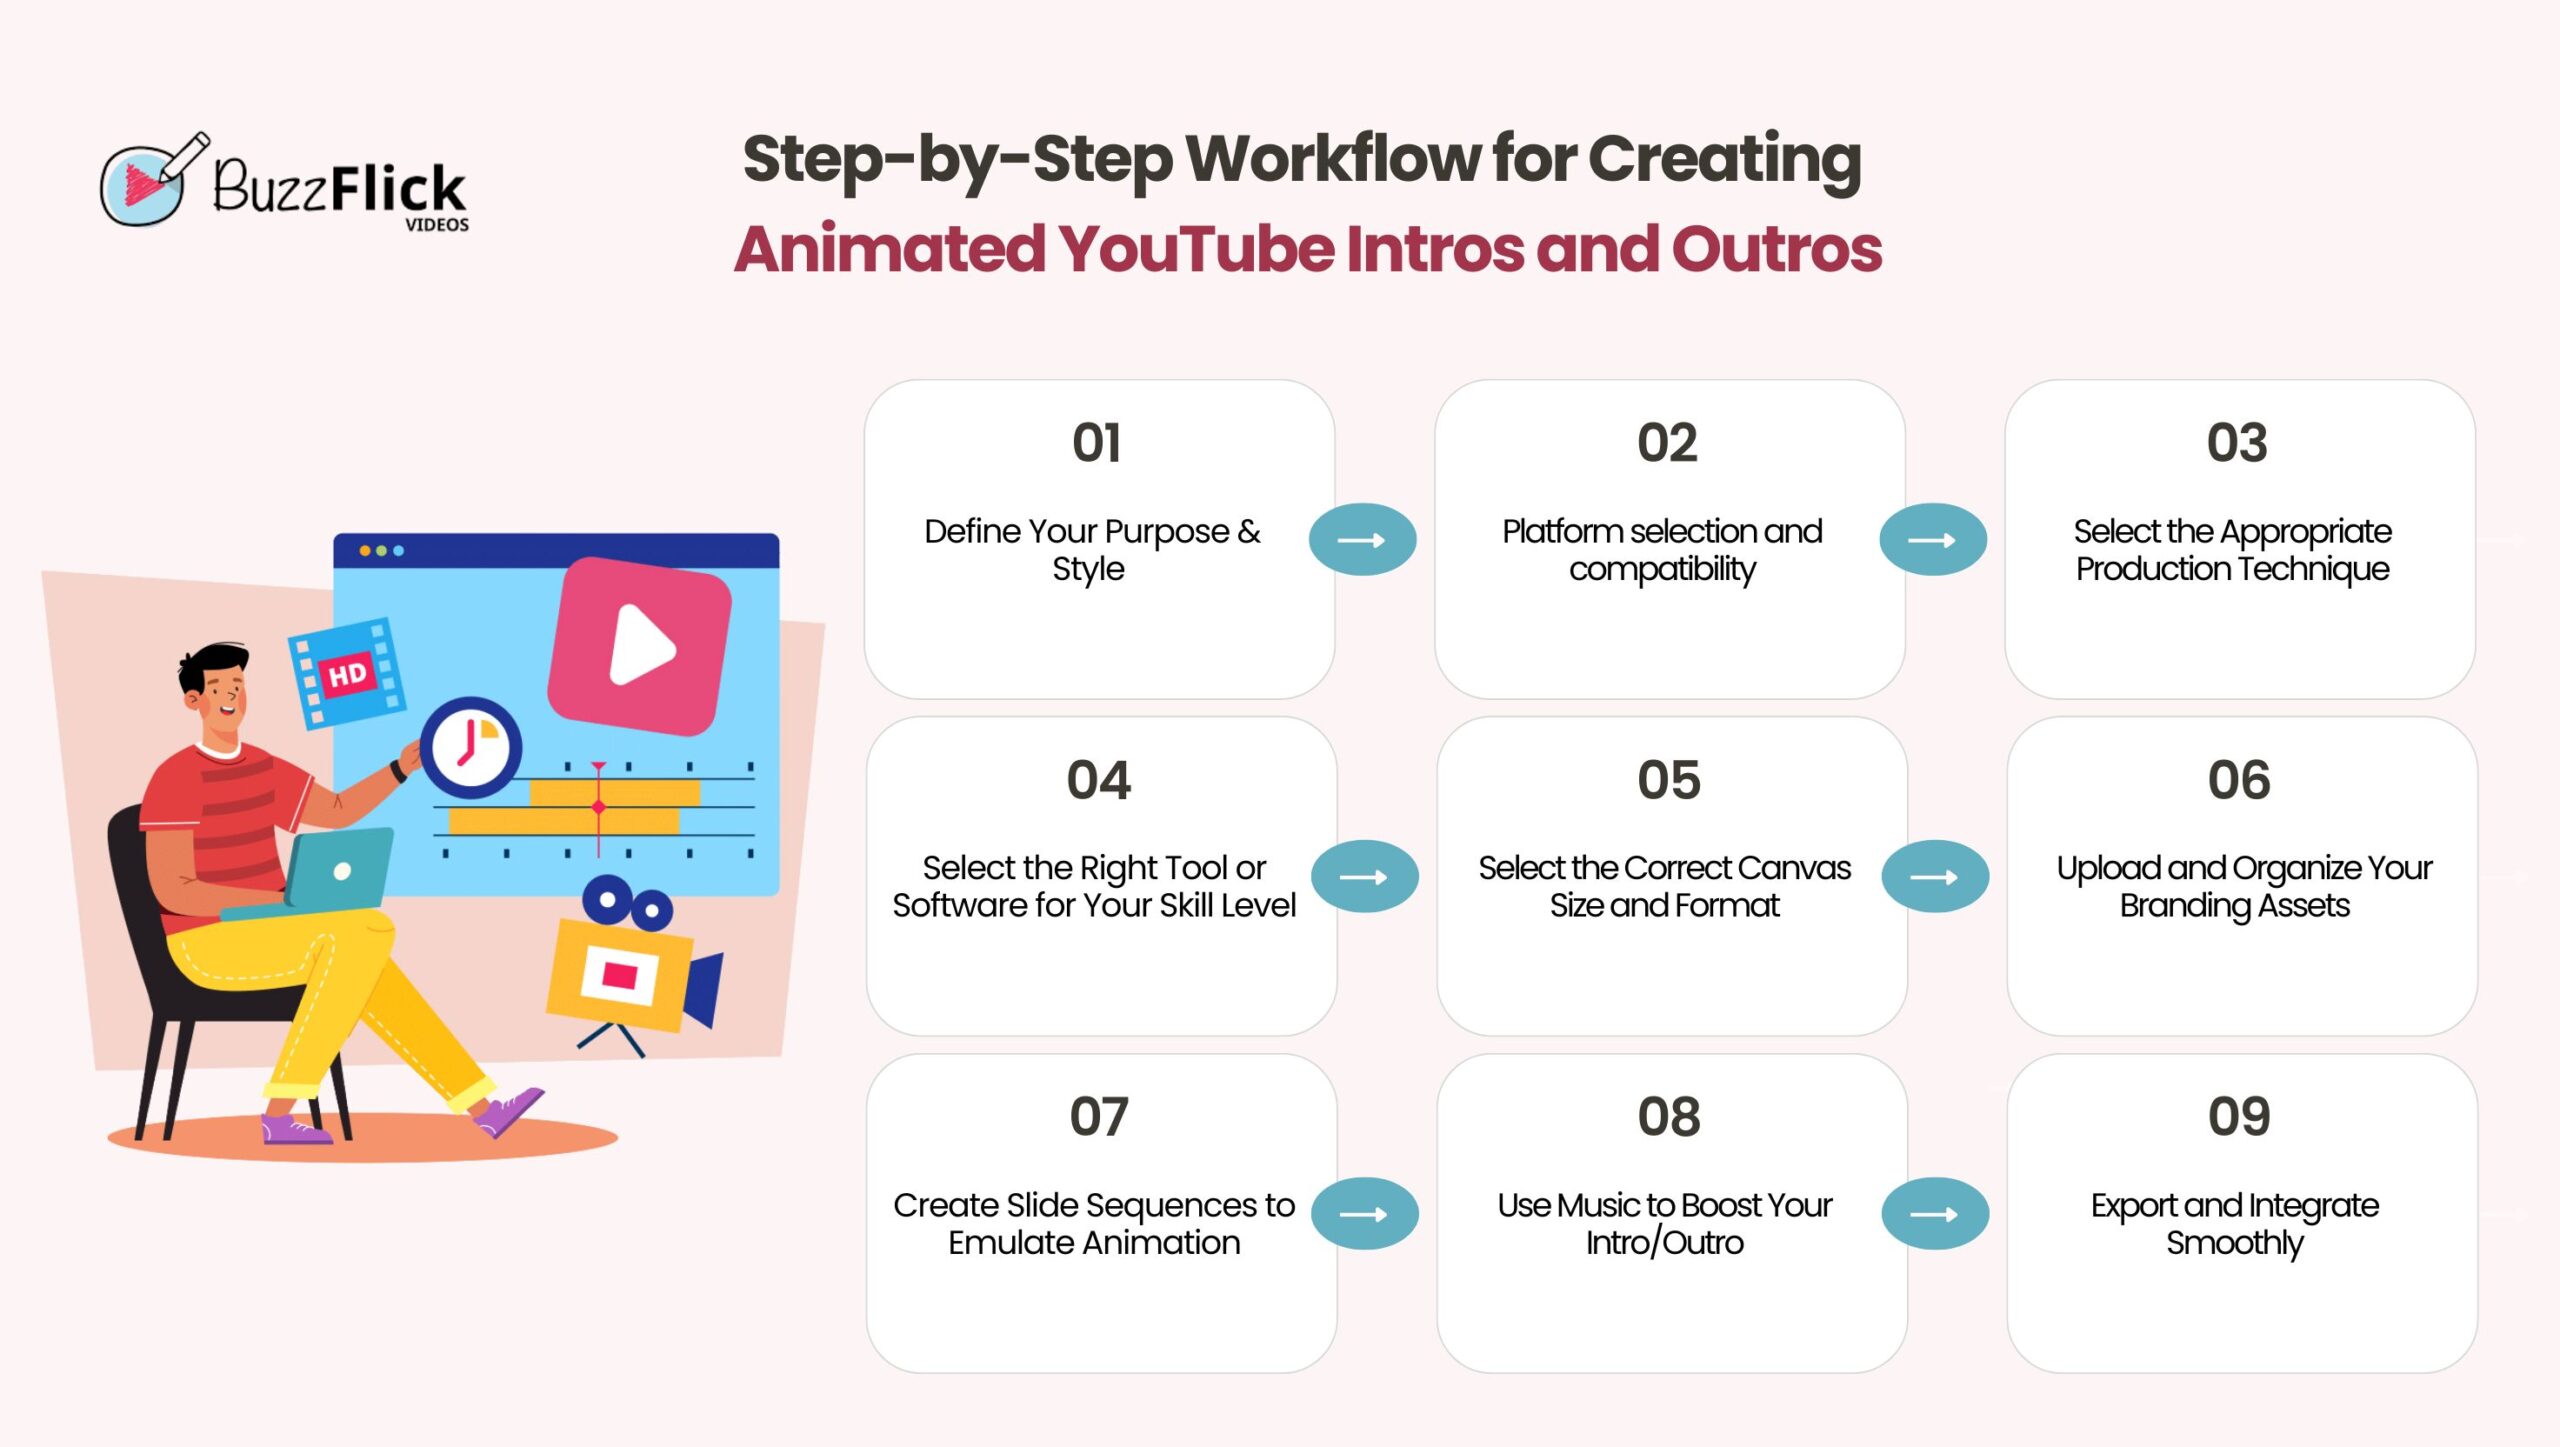
Having an animated YouTube intros/outros is not just about aesthetics, it is one of the most valuable methods of maximizing engagement, brand awareness, and subscribers since day-one. Well, here is the step-by-step guide of creating effective youtube animated intro/outro.
Establish the why of your intro before you create anything. Every visual aspect, from color to animation, must support the purpose of your channel.
Tip: Mood board or sketch out your inspiration first before commencing to ensure visuals align with your objectives.
Your intro & outro on YouTube should be a brief visual signal, not a full shot. Most viewer drop-offs happen within the first minute, and the first 15 seconds are especially critical, as they set the tone for whether viewers engage or leave
Too short and it’s forgettable; too long and it can annoy viewers. Here is what works :
How to make an outro for YouTube:
Goal: Keep both consistent and make them feel like a natural extension of your content, not an ad.
You don’t have to be a professional designer to produce something excellent. Some options depend on your experience and budget.
Here are your best options based on ease of use and customization:
| Tool | Best For | Pros | Cons |
| Canva (Pro) | Beginners & Fast Edits | Easy drag & drop, templates, animations | Limited advanced motion effects |
| Adobe After Effects | Pros & Advanced Users | Fully customizable, professional effects | Steep learning curve |
| Renderforest / Animaker / InVideo | Web-based creators | Ready-to-use templates, fast exports | Watermark unless premium |
| Panzoid | Free Community Tool | Custom 3D animations, no sign-up needed | Outdated UI, not very beginner-friendly |
Begin by planning your project for success:
Pro Tip: Make your ending duration 3–8 seconds for intros, and 5–10 seconds for outros to capture viewer attention without dragging.
If you’re unsure about the right dimensions, check out our blog: YouTube Banner Size & Dimensions
Your intro/outro should directly convey your channel’s identity. To make this happen, upload the following:
Organize your assets in a “Brand Kit” folder (in case of using Canva Pro) so that all of them remain easily accessible for future projects.
In apps like Canva or Google Slides, where animation features are limited, you can simulate motion by changing components somewhat across many slides. The result seems animated when exported as a video.
To create a dynamic YouTube intro, organize a sequence of slides whose visual components shift from one to another smoothly. Here’s a simple 3-slide outline for your animated intro:
Slide 1: Logo Fade-In with Tagline
Start with a blank background and soft fade in your logo in the middle of the screen. Insert your channel’s slogan or tagline below the logo. Employ the use of opacity parameters or timed transitions to achieve a subtle fade-in effect. Select brand colors to ensure consistency.
Slide 2: Channel Name Entrance
On the following slide, introduce your channel name with a direction of movement (e.g., slid in from the top or left side). Move the logo in slightly or place a glow effect on the logo to create the feeling of movement. Insert additional supporting graphics, such as a background shape or line animation, subtly executed.
Slide 3: Visual Impact Effect
Use this last intro slide to introduce a speed kick of energy, like sparkles, a spinning element, shape explosion, or color flash. This provides a punchy conclusion before moving on to your main content. Make it short and not distracting in order to have a professional finish.
A robust outro assists in enhancing engagement by making the audience subscribe or view additional videos. Employ an ordered sequence to lead them visually:
Slide 1: Thank You Message with Logo
Begin with a courteous message such as “Thanks for Watching!” or “See You Next Time!” right in the middle, positioned prominently. Add your logo to ensure branding is reinforced, and provide a contrasting background slightly different from your intro to indicate an end.
Slide 2: Social Media Animations
Add your social media handles and animate them separately one after the other (for example, Instagram, Twitter, TikTok). Arrange them either vertically or horizontally and allow each of them to slide, fade, or pop in order to keep motion going.
Slide 3: Suggested Content or Subscribe Prompt
Use the last slide to promote your upcoming videos. Make room for YouTube’s clickable end screen items, usually two or three video thumbnails and a round subscribe button. Insert some subtle movement, such as a pulsing ring on the subscribe button or a moving background, to make the slide dynamic.
Music can play a role in setting the tone, offering a form of emotional context, and offering a certain degree of polish, hence, the intros and outros become more memorable and more compelling in general.
After your intro is completed, optimize it for YouTube performance.
Pro Tip: Make sure the transitions between your content and the intro/outro feel seamless. You can use fade-ins, background music that blends smoothly, or visual effects to maintain consistency throughout the video.
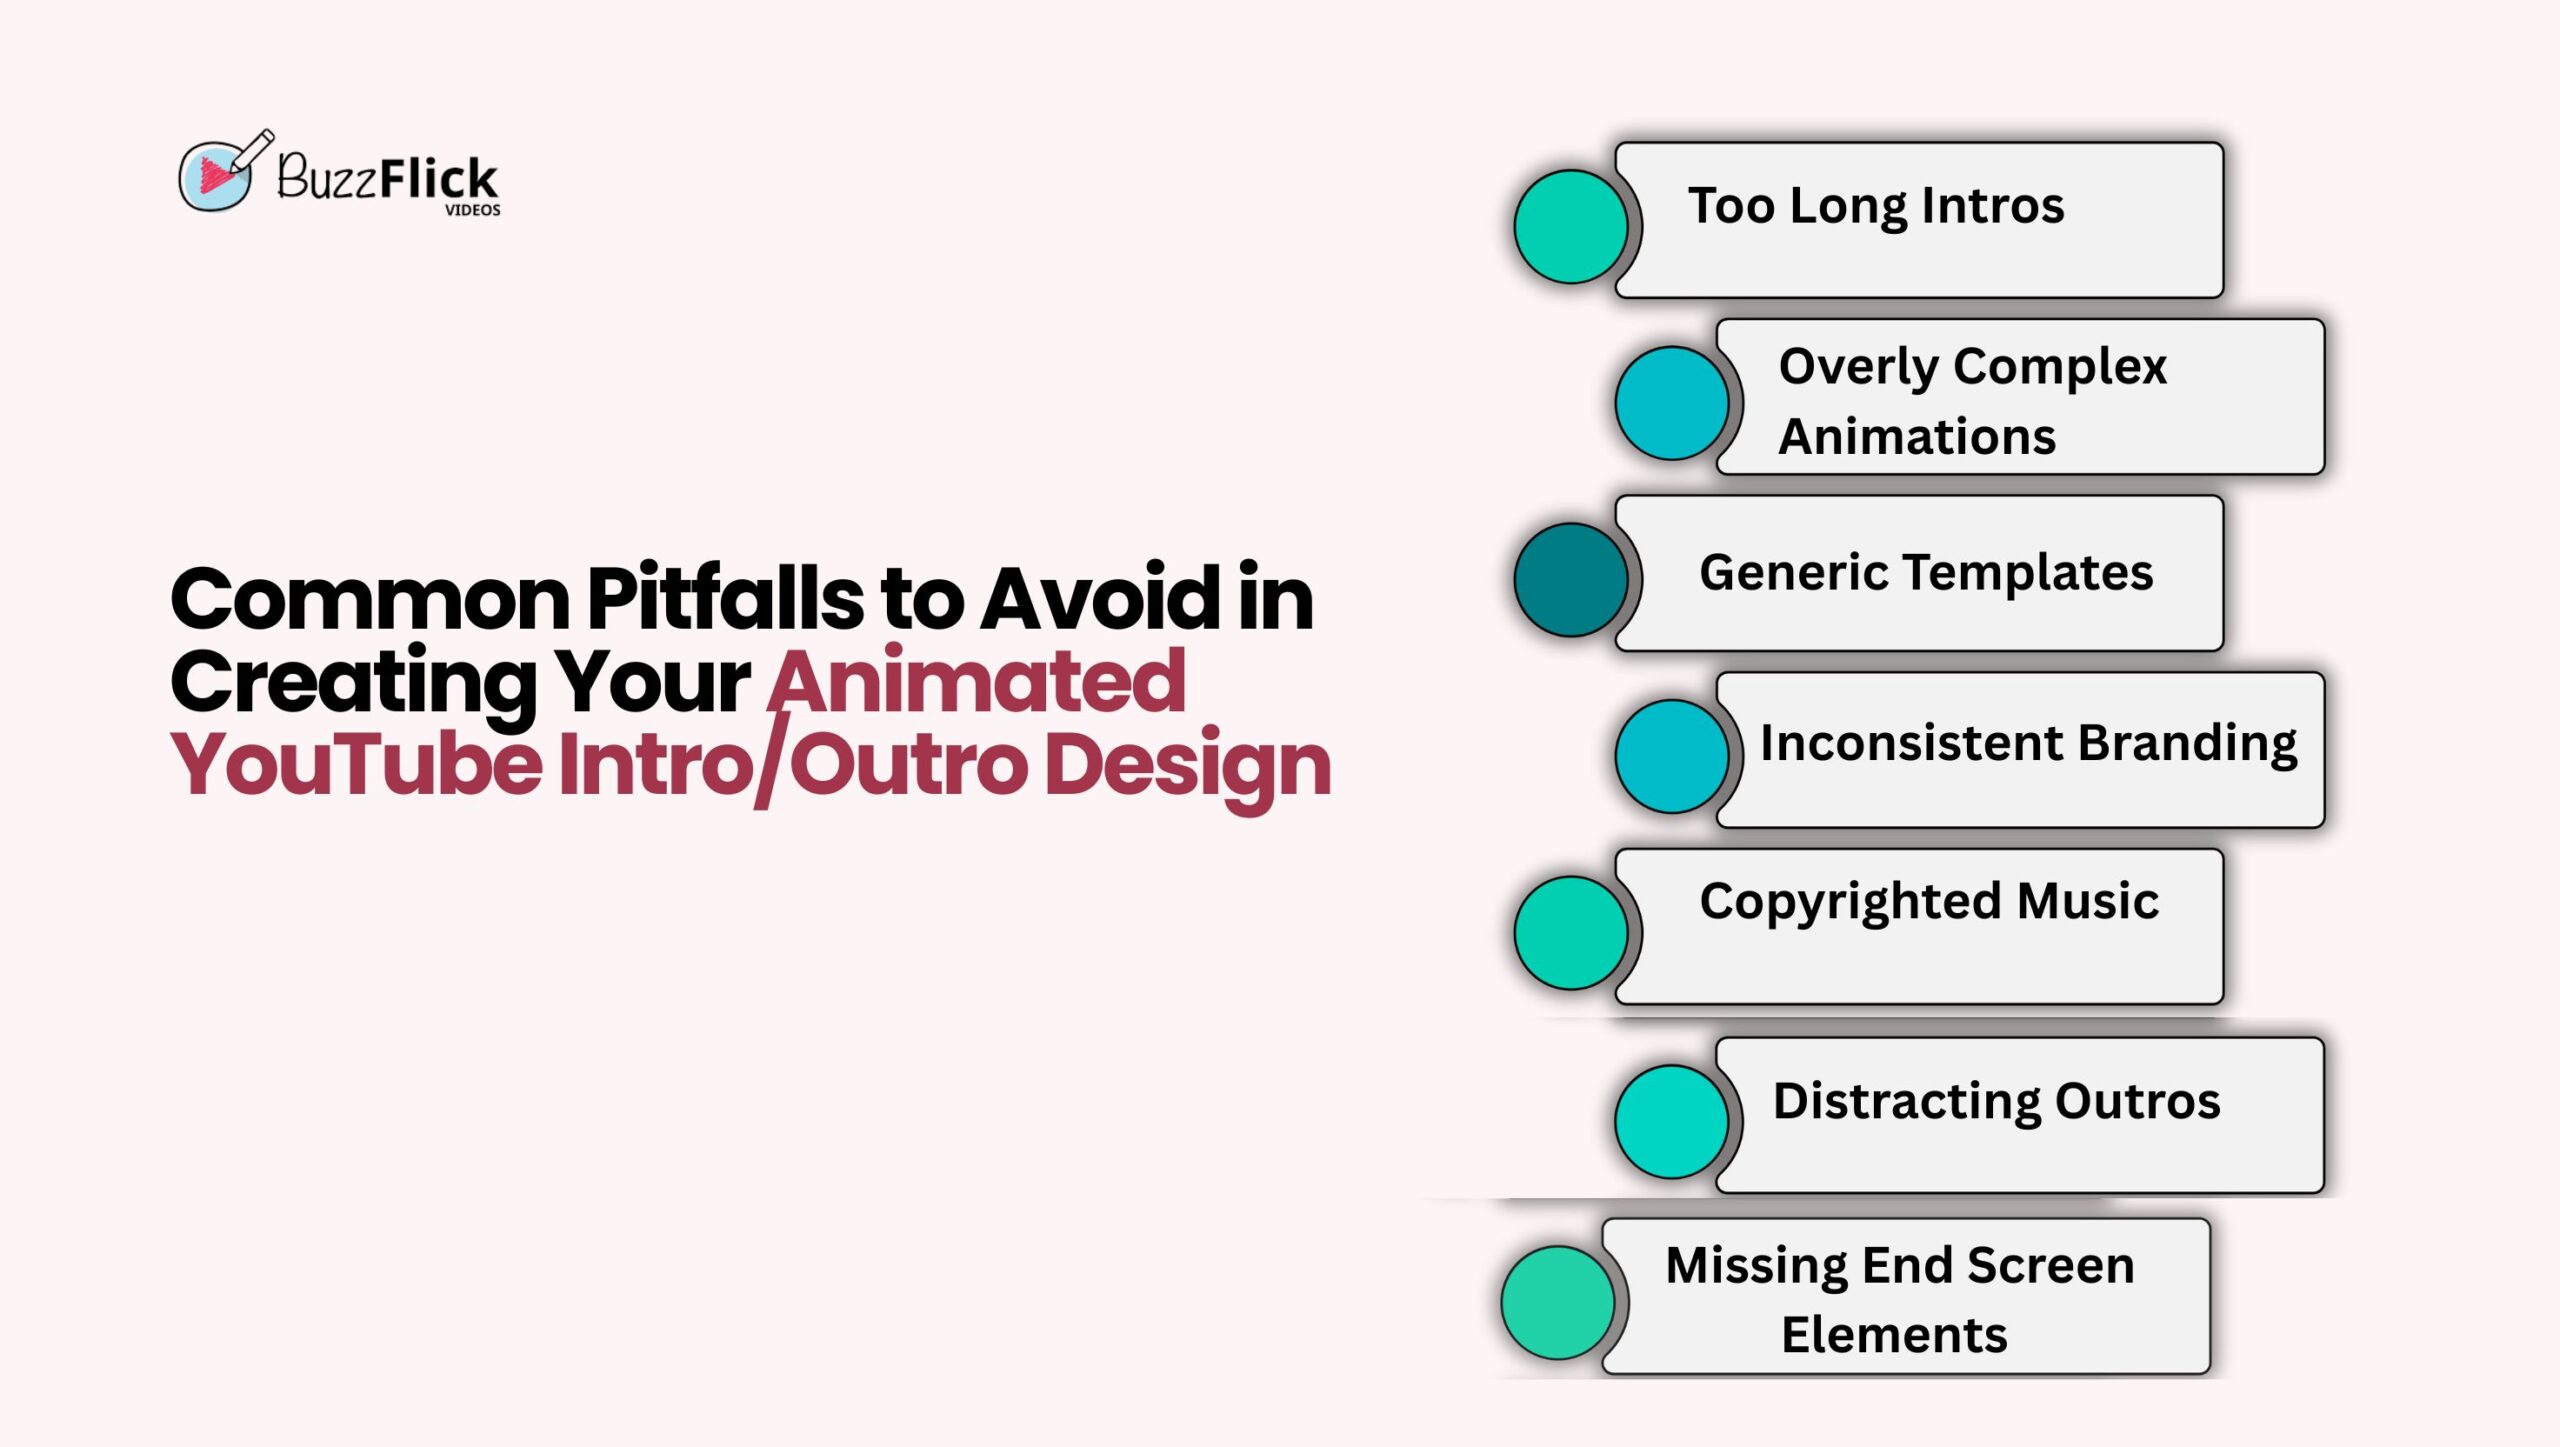
Simple mistakes can turn your video intros and outros to feel unprofessional or unhelpful even when you use the best tools. The pitfalls that must be avoided are as follows:
| Pitfall | What It Means & How to Avoid It |
| Too Long Intros | Keep intros under 5 seconds to retain viewer attention. |
| Overly Complex Animations | Avoid clutter. Use smooth, simple transitions that don’t distract. |
| Generic Templates | Customize templates to match your brand — don’t use them as-is. |
| Inconsistent Branding | Stick with your brand’s fonts, colors, and style for consistency. |
| Copyrighted Music | Use royalty-free tracks to avoid strikes from YouTube’s Content ID system. |
| Distracting Outros | Keep others focused. Highlight one or two clear CTAs (like subscribe or watch next). |
| Missing End Screen Elements | Add clickable links (videos, subscribe button) manually in YouTube Studio after upload. |
An effective introduction or outro can instantly raise your YouTube videos, define your brand identity, and keep viewers interested. For a beginning content creator, firm trying to stand out, or starting out, the appropriate animation tool can be transformative.
These are five of the best-rated platforms for producing professional YouTube intros and outros — along with their features and price points so you can choose the best for your requirements:
| Tool | Best For | Key Features | Pricing |
| Renderforest | Beginners & brands needing quick animations | Ready-made templates, Logo animations & transitions and, Royalty-free music support | Free: Watermarked videos
– Lite: $9.99/month – Pro: $19.99/month – Business: $29.99/month |
| Animaker | Custom storytelling & character intros | Drag-and-drop editor
– Animated characters & backgrounds – Voiceover support |
– Free: Limited access
– Basic: $20/month – Starter: $35/month – Pro: $79/month |
| Biteable | Fast, professional-looking animations | Stylish templates
– Stock media library – Timeline-based editor |
– Starter: $19/month (1 user)
– Pro: $49/month – Teams: $99/month (3+ users |
| Panzoid | Free 3D intros with deep customization | -Community-contributed templates
– Full 3D text control – Real-time preview & VFX |
– 100% Free to use |
| Canva | Beginners looking for stylish, quick intros | Hundreds of animated templates
– Logo intros, lower-thirds – Soundtracks and stock assets |
– Free: Basic templates & features
– Pro: $14.99/month (more templates, branding tools) |
Developing a high-quality, animated youtube intro/ outro is not only about looks, it’s about creating an impression. Based on the latest Wyzowl report, 89% of viewers claim they’re more likely to remember a brand that produces regular video content with good visuals and branding.
That’s why having a professional-looking intro and outro can make your content look much more professional and improve viewership retention.
The best part? You don’t have to be a video editing guru to do this. By using the proper tools and a little creative thinking, even novices can create engaging animations that bring their YouTube videos to life.
And if you don’t have time to spare or are looking for something bespoke and world-class, working with a seasoned creative agency such as BuzzFlick is a game-changer. With decades of experience in the business and a renowned group of creatives, BuzzFlick, a 3D animation company in US, can assist you with the lot, scriptwriting and storyboard creation, animation, and final cut, so your YouTube intros and outros are not just visually appealing but also resonate with your brand’s identity.
A static intro is a logo or image screen, whereas an animated intro has motion graphics, transitions, music, and sometimes text. Animated intros are more dynamic and engaging.
Indirectly, yes. A well-made intro enhances watch time and retention, both of which are used by YouTube to rank videos.
Custom animated intros/outros will cost between $200 and $1,000+, depending on duration, complexity, and quality. BuzzFlick has customizable packages for startups and expanding channels.
Most projects will take 1 to 3 weeks depending on revisions and scope. BuzzFlick frequently delivers faster turnaround for simple or templated versions.
Your intro ideally would be 5–10 seconds and your outro 10–20 seconds. Keeping them brief keeps the viewer engaged without interrupting the continuity of your content.
Yes! BuzzFlick creates custom animated outros and intros, from script to final export, specifically tailored to capture your channel’s personality and objectives.
Chromebooks have grown from just for typing essays and watching skits to letting everyone test their creativity in their desired ways. Yes, those days are...
Read More
Get A Custom Quote Now
Copyright © Buzzflick 2026, All Rights Reserved.
Get Video Animation at Reasonable Prices at BuzzFlick! Get A Quote!