- Author: Umair Malik
Date: Jul 3, 2023 - Category : Video Marketing, Video Production


In today’s digital age, video content has become increasingly popular, and creators are constantly looking for ways to enhance the visual appeal of their videos. One effective technique that has gained widespread popularity is the green screen video effect.
With a green screen, also known as chroma keying , you can transport yourself to any location or create stunning visual effects without leaving your home. Especially, people are creating various types of YouTube videos using green screens and gaining popularity across the channel.
In this comprehensive step-by-step guide, we will walk you through the process of creating green screen videos that will make your content stand out.
What Exactly Is A Green Screen?
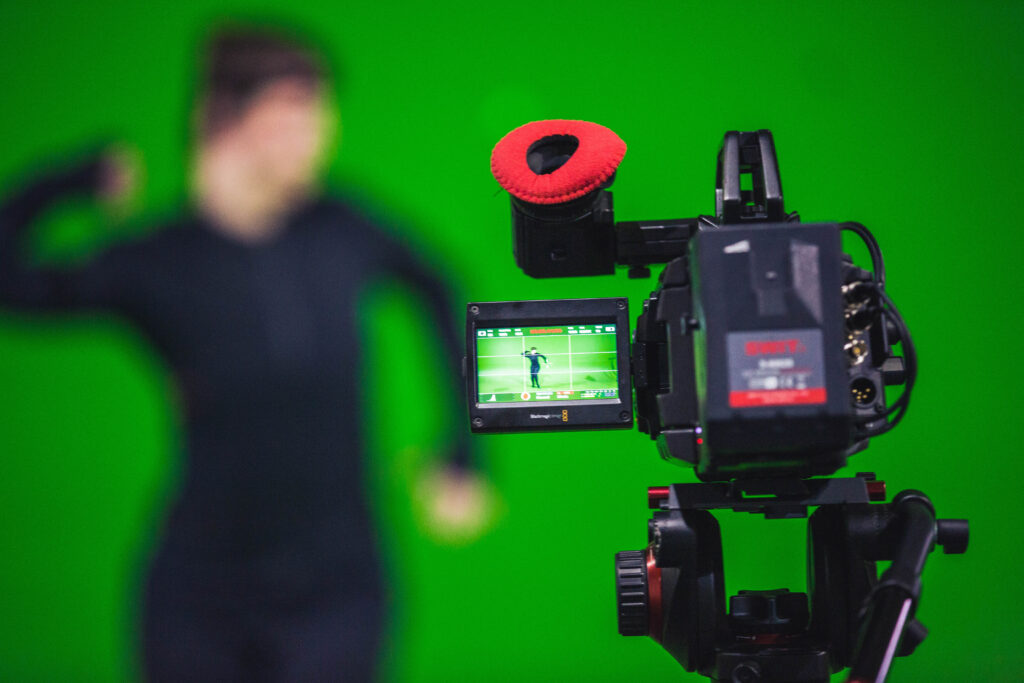
A green screen is a technique used in filmmaking and photography where a solid green background is used to later replace it with a different image or video during post-production.
The green screen works by using a specific color, usually green, as the background during filming. This color is then replaced with a different image or video during post-production using specialized software. The green color is chosen because it is easily distinguishable from the subjects in the foreground, allowing for more accurate and precise editing.
By utilizing a green screen, video producers can easily replace the green background with any desired image or footage during post-production. This flexibility allows for versatile settings and locations without the need for expensive on-site filming.
You can create lots of content using a green screen and increase your following online. For instance, you can create various types of instructional videos, explainer videos, or even engaging product reviews.
If you do not have much time to set up a green screen, and shoot and record green screen video footage, you can outsource it to a trusted company. And what’s better than BuzzFlick? We will create your instructional videos using a green screen most professionally and efficiently. Just buzz us with whatever your query is, we are here to cater to your needs.
The seamless integration of elements achieved through green screen technology enhances the visual quality and professionalism of the final product. Moreover, it opens up endless creative possibilities, enabling the incorporation of special effects, virtual sets, and imaginative scenarios that enhance storytelling and captivate audiences.
Easily replace the green screen with any desired image or footage during post-production.
Avoid the need for expensive on-site filming by simulating various settings and locations.
Achieve a polished and professional look with elements seamlessly blending into the scene.
Unlock endless opportunities for special effects, virtual sets, and imaginative storytelling.
Captivate audiences with visually stunning and immersive content.
Creating Green Screen Videos allows you to add stunning visual elements and transport your subjects to any imaginable location. Let’s explore how to create green screen videos and unleash your imagination in the world of virtual storytelling.
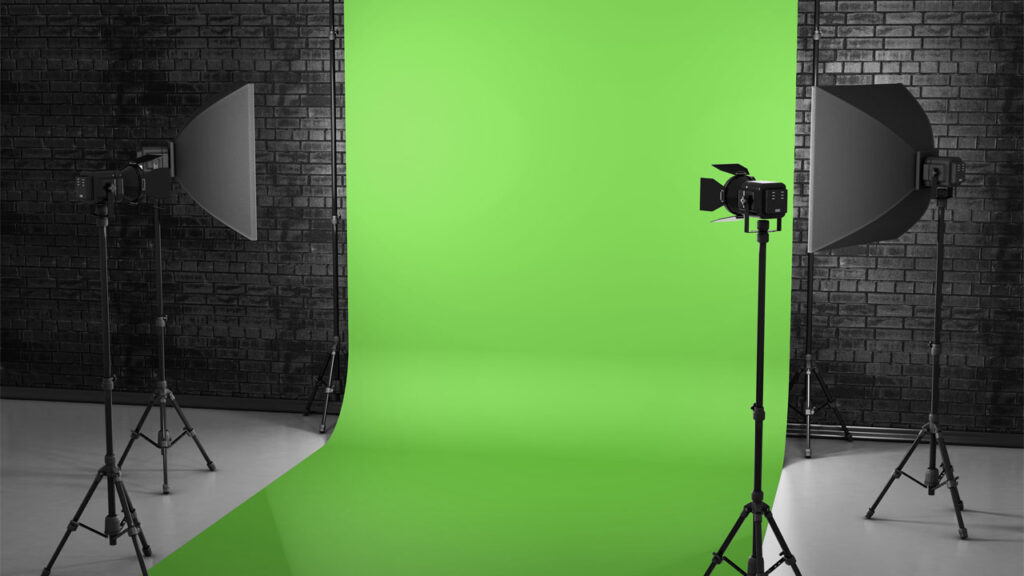
Setting up your green screen properly is crucial for achieving high-quality video production. Follow these steps to set up a green screen effectively:
Find a space with enough room to accommodate your subject and the green screen. Ensure that the area is well-lit and has minimal distractions or shadows.
Hang or mount the green screen fabric or material securely, ensuring it is smooth and wrinkle-free. If painting a wall, use chroma key green paint evenly across the surface. You can also use a collapsible green screen panel easily available at every hardware store.
Set up your lighting equipment to achieve even illumination on the green screen. Use soft lighting sources to minimize harsh shadows and ensure uniform color saturation.
Place your subject at an appropriate distance from the green screen, ensuring they are well-lit and in focus. Avoid any color clashes between your subject’s clothing and the green screen.
Adjust the position and intensity of your lights to eliminate any hotspots, shadows, or color variations on the green screen. Aim for a consistent and evenly lit background.
Take test shots or record short video clips to evaluate the quality of the green screen setup. Make any necessary adjustments to the lighting or positioning to achieve optimal results. Also, improper lightning set up can have adverse effect on sight that can hazardous effect, that is why it is important for lightning specialists to have DSE Assessor Training to avoid such complications.
Remember to experiment with different lighting setups and camera angles to find the most effective configuration for your specific requirements. With a well-set green screen, you’ll be ready to create captivating videos with seamless integration of backgrounds and creative visual effects.
Proper lighting techniques are crucial when working with a green screen to ensure optimal results. Here are some essential techniques for advanced lighting for green screen:
Employ the classic three-point lighting setup consisting of a key light, a fill light, and a backlight. This helps to evenly illuminate the subject and separate them from the green screen.
Set up additional lights specifically for the green screen to ensure it is evenly lit without casting shadows. This helps to achieve a clean and consistent background for easier post-production editing.
Place your lights strategically to minimize spillage of light onto the green screen or any reflective surfaces. This helps to prevent color contamination and unwanted reflections on the subject.
Position your lights at a sufficient distance from the green screen to reduce hotspots or overexposure. Angle the lights to avoid direct reflections and maintain a smooth and uniform green background.
Adjust the brightness and intensity of your lights to achieve a balanced lighting setup between the subject and the green screen. This helps to ensure accurate color reproduction and easy keying during editing.
Soften the light sources using diffusers or softboxes to create more flattering and even lighting on both the subject and the green screen.
Remember to test and fine-tune your lighting setup before recording or shooting. Regularly monitor the results on a calibrated monitor to ensure a well-lit green screen and a properly exposed subject.
Shadows can ruin your footage and you cannot achieve even lighting on a green screen unless you fix this issue. Here are some tips for avoiding shadows and achieving even lighting on the green screen.
Utilize multiple lights positioned strategically around the green screen to ensure uniform illumination. This helps minimize shadows and creates an evenly lit background.
Position the lights at equal distances from the green screen to maintain consistent lighting across the entire surface. This helps avoid areas of overexposure or underexposure.
Angle the lights to illuminate the green screen evenly without casting shadows or creating hotspots. Experiment with different angles to find the most effective setup.
Soften the light sources by attaching diffusers or using softboxes. This helps spread the light evenly and minimizes harsh shadows on the green screen.
Position the subject as far away from the green screen as possible to reduce the chance of casting shadows on it. This helps maintain a clean and consistent background.
Pay attention to any light spillage from the subject onto the green screen. If spillage occurs, use flags or gobos to block the light and prevent color contamination.
Adding a backlight to illuminate the subject from behind helps separate them from the green screen and further reduces shadows.
Regularly review test shots or footage to identify any areas with uneven lighting or shadows. Make necessary adjustments to the light positioning, angles, or intensity to achieve a balanced and evenly lit green screen.
Assess the results on a calibrated monitor to ensure accurate color representation and adjust as needed. With careful attention to lighting, you can avoid shadows and achieve a smooth and evenly lit green screen for seamless post-production editing.
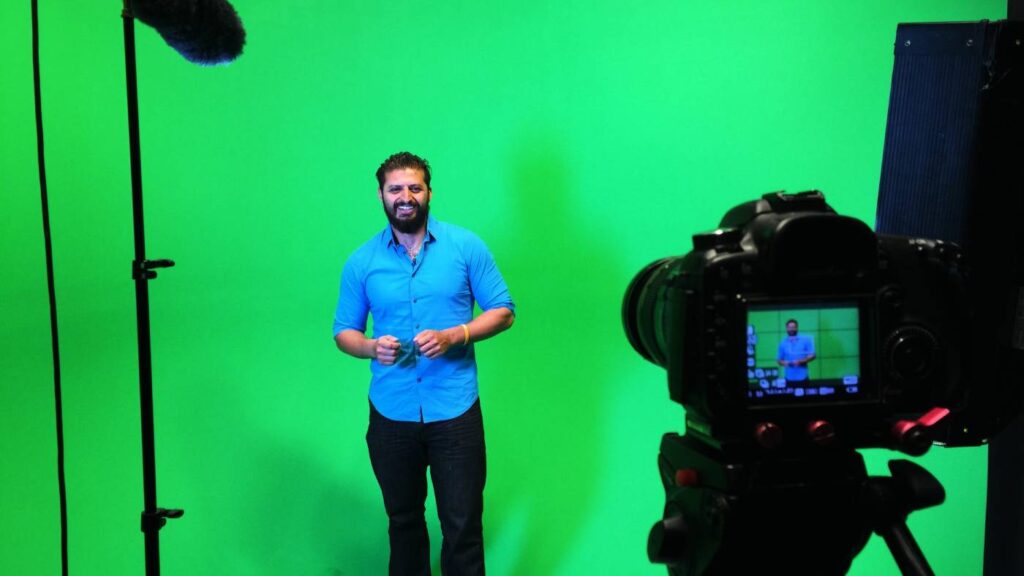
When it comes to your green screen project, selecting the perfect camera and lens is essential for achieving the desired green screen videos. The right camera should have the necessary features and settings to capture high-quality footage, while the lens choice will impact depth of field and image sharpness.
Camera placement and positioning are also important for perfect green screen videos. Here are some points to keep in mind:
2. Subject Positioning
Proper subject placement and distance from the green screen are essential factors to consider for a successful green screen project.
If you do not understand how advanced lighting for green screens works, BuzzFlick does. We will create your DIY green screen video perfectly as we understand lighting techniques really well. Just buzz us with your ideas, and we will convert them into reality.
We Do Green Screen Videos Like A Pro

Effective subject direction and engaging footage are crucial elements for the success of your green screen videos. Keep in mind the following steps while green screen recording and shooting:
By implementing these tips for directing your subject and capturing engaging footage in your DIY green screen project, you’ll elevate the quality of your videos and achieve impressive results.
While working with a homemade green screen, keep in mind the color spill. It can be a common challenge when working on a green screen video project. With the right techniques, you can minimize it and achieve a clean key.
Experiment with different approaches to find the combination that works best for your project, and achieve professional-looking results. Here are some effective methods to help you get the best results:
When working on DIY green screen video projects, capturing high-quality audio is just as important as capturing great visuals. That is why we recommend recording it separately to achieve better control over your audio during the editing process.
Here’s why it can make a significant difference:
Remember, when recording audio separately, use quality microphones and ensure proper synchronization between the audio and video tracks during editing. This technique provides greater control over your audio and contributes to a more professional and engaging final product.
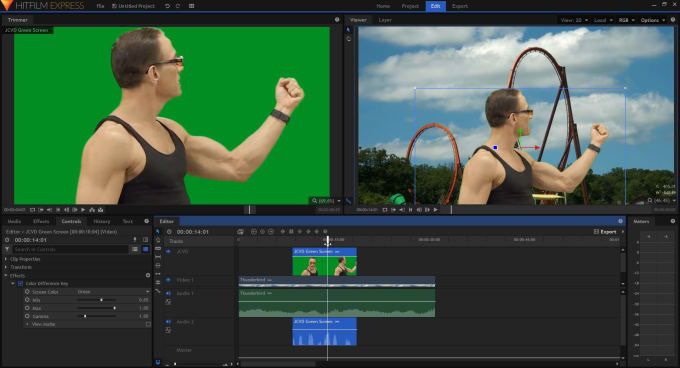
When it comes to video editing, having the right software with chroma key capabilities can greatly enhance your editing process, especially for projects involving green screen or chroma key effects. Here’s an overview of popular video editing software that offers chroma key features best for your green screen videos:
These are just a few examples of green screen software for video editing with chroma key features. Each software offers unique capabilities and varying levels of complexity, so it’s essential to choose the one that best suits your needs and proficiency level.
If you’re looking for free alternatives to create green screen video effects, there are several software options available that can help you achieve your desired results. Let’s explore some of these free tools and their capabilities:
These free alternatives provide varying levels of Green Screen capabilities, and their usage will depend on your specific requirements and preferences. Take the time to explore and experiment with each software to find the one that best suits your needs for creating impressive green screen video effects.
BuzzFlick has a team of incredibly smart and professional designers and video editors with hands-on software experience. Your raw green screen video footage will work wonders in our hands. Just get in touch with us to create a buzz.
We Know About Software You Are Stuck On

Green screen videos require efficient video editing. You can learn it through a quick video editing start guide with different stages to bring your videos and green screen clips to life. Produce captivating green screen videos and apply effects by following these steps:
Step 1: Importing Your Green Screen Video Footage:
To begin, import your recorded footage into your preferred video editing software. This step allows you to access and manipulate your clips within the editing interface, setting the stage for the green screen effect.
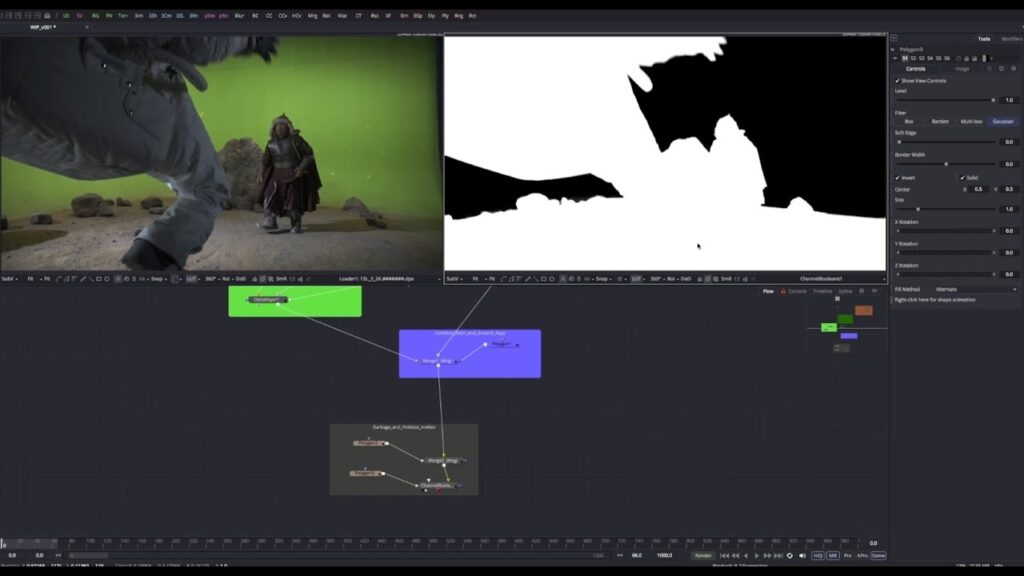
Step 2: Chroma Keying Techniques:
Utilize chroma-keying techniques to remove the green background from your footage. By using specific settings and tools in your editing software, you can precisely isolate and extract the green color, leaving a transparent background behind.
Step 3: Refining the Composite:
Take the time to adjust the settings and refine the composite to achieve a seamless result. This includes fine-tuning parameters such as transparency, feathering, and edge blending. Pay attention to details and ensure that your subject is well-integrated with the new background, creating a visually cohesive composition.
The most crucial step at this stage is chroma keying. Here are some tips to master the art of chroma keying:
Select a video editing software that offers robust chroma-keying capabilities. Look for features such as precise color selection, adjustable sensitivity, and advanced keying options. Popular software options like Adobe Premiere Pro, Final Cut Pro, and Davinci Resolve provide powerful tools to enhance your chroma-keying process.
You can go through the comparison of software you widely used, i.e., Adobe premiere pro vs. after effects to evaluate what software you need.
To ensure a successful chroma key, it’s essential to have even and well-lit green screen footage. Avoid shadows and wrinkles on the green screen by using bright, uniform lighting. This will facilitate accurate keying during the editing process.
Experiment with the keying settings in your chosen software. These settings may include color tolerance, spill suppression, and edge refinement. By adjusting these parameters, you can achieve a clean removal of the green background while preserving the intricate details of your subject.
After applying the initial key, carefully examine the results and make any necessary adjustments. Look out for any remaining green spill or halo effects around your subject. By refining the keying settings, you can achieve a seamless composite that blends your subject seamlessly into any desired background.
To achieve professional-looking green screen videos, it’s essential to pay attention to the details and refine your composite for a seamless result. Here are some key techniques for adjusting settings and refining the composite in order to elevate the overall quality of your video production.
One crucial aspect of refining your green screen composite is adjusting color correction and lighting to ensure a seamless blend between the subject and the background. Make precise adjustments to the color temperature, contrast, and saturation to match the lighting conditions of both elements. This step helps eliminate any inconsistencies and creates a more realistic and cohesive final result.
To refine the edges of your subject and ensure a clean separation from the background, utilize the keying controls available in your video editing software. These controls allow you to adjust parameters like edge feathering, spill suppression, and transparency to fine-tune the composite. Pay attention to any artifacts or fringing around the edges and make necessary adjustments to achieve a natural-looking integration.
Takeadvantage of blending modes and opacity settings to further refine the composite. By trying out different blending modes such as “Screen,” “Multiply,” or “Overlay,” you can achieve different levels of transparency and blending between the subject and the background. Adjust the opacity as needed to create a harmonious balance and ensure the subject seamlessly interacts with the new environment.
To enhance the realism of your green screen composite, consider the interaction of your subject with the background environment. Adjust the shadow and reflection settings to match the lighting conditions of the new setting. By paying attention to these details, you can create a more convincing and immersive video effect.
Remember, the key to a seamless green screen composite lies in the meticulous adjustment of settings and the careful refinement of the composite. By fine-tuning color correction, utilizing keying controls, experimenting with blending modes, and attending to shadows and reflections, you can elevate your Green Screen Videos to a professional level.
To create captivating green screen videos, it’s important to go beyond the basics and explore techniques that can enhance the overall impact of your video. By incorporating various elements and employing effective editing techniques, you can take your Green Screen footage to the next level.
Here are some ways to enhance the green screen effect and make your videos more compelling.
To make your green screen video more visually engaging, consider adding background images, videos, or virtual sets. This allows you to transport your subject to different locations, whether it’s a bustling cityscape, a serene beach, or a futuristic virtual environment. By selecting appropriate backgrounds that complement your subject and story, you can create a more immersive viewing experience for your audience.
Another way to enhance the green screen video effect is by incorporating motion graphics and visual effects into your video. Whether it’s animated text, dynamic transitions, or stunning visual overlays, these elements can add depth and visual interest to your footage. By strategically placing motion graphics and visual effects, you can elevate the overall production value and make your video more captivating.
Color correction and other editing techniques play a vital role in improving the final result of your green screen video. By adjusting the color balance, contrast, saturation, and other parameters, you can ensure that your subject seamlessly integrates with the chosen background.
This step helps to eliminate any color discrepancies and create a cohesive visual aesthetic. Additionally, you can utilize other editing techniques such as sharpening, noise reduction, and image stabilization to further enhance the overall quality of your video.
By implementing these techniques in your DIY green screen video project, you can create visually stunning and professional-looking videos that capture the attention of your audience.

Once you have completed your DIY green screen video project, it’s time to export and share your masterpiece with the world. To ensure your video looks its best and reaches your intended audience, follow these essential tips:
Choosing the Appropriate Video Format and Resolution:
Selecting the right video format and resolution is crucial when exporting your DIY green screen video. Consider the platform or destination where you plan to share your video and choose a format and resolution that is compatible and optimized for that platform. This will ensure optimal playback quality and compatibility across different devices.
Tips for Optimizing Your Video for YouTube, Social Media, or Your Website:
To maximize the visibility and reach of your DIY green screen video, optimize it for specific platforms such as YouTube, social media, or your website. You have to keep in mind the for what purpose you are making the videos.
Most people create training videos by using green screens. Here are some examples of training videos if you are making one. Choose among them and optimize accordingly. But keep in mind:
Strategies for Promoting and Sharing Your Green Screen Masterpiece:
Promotion is key to getting your DIY green screen video noticed. Here is how you can do it:
By choosing the appropriate video format and resolution, optimizing for specific platforms, and implementing effective promotion strategies, you can ensure that your DIY Green Screen video achieves the desired impact.
Share your green screen masterpiece confidently, knowing that it has been optimized for optimal viewing and has been strategically promoted to reach your target audience. Embrace the Green Screen Videos and showcase your creativity to the world.
Looking for a content and video marketing team to manage your creative chaos? BuzzFlick is your key to social media success. We spread content in the digital realm in an incredibly strategic way. Just get in touch with us to get your content noticed and applauded.
Reach where you want to with BuzzFlick
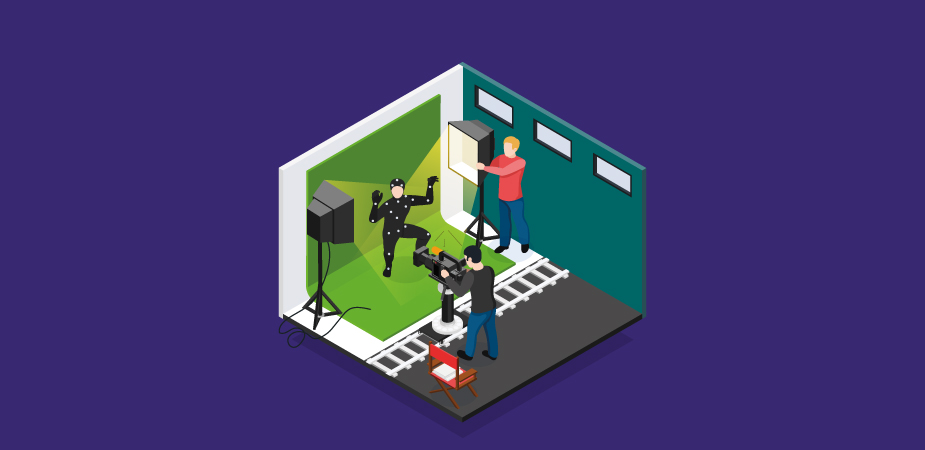
All you need is a green piece of cloth or fabric, a camera, lights, and video editing software. With these tools, you can create your own green screen background and achieve stunning visual effects in your videos.
Almost every material of green shade can be used as a green screen but make sure the fabric is uniformly plain green, matt, reasonably deep, and creaseless. You can also use green screen boards and wooden walls, provided the conditions mentioned.
Most people use some type of fabric for green screens, but there are many options you can try. We recommend foam or spandex as they are more resistant to wrinkles as compared to fabric.
Maintaining sharp edges is the most important aspect of green-screen videos. To maintain sharp edges in green screen videos, use a fast shutter speed to prevent motion blur. This may result in a slight stuttering movement on the actors but ensures a seamless green screen effect.
Let’s put an end to our comprehensive guide on creating Green Screen Videos. By following the step-by-step instructions and implementing the tips and techniques provided, you are well on your way to unlocking endless creative possibilities for your videos.
Remember, practice makes you perfect, so don’t be discouraged if your first attempts aren’t flawless. With time and experience, you’ll master the art of green screen production and captivate your audience with professional-quality videos.
Read it here:
Cinema 4D vs Maya: The Never-ending Debate of Visual Effects
Want to grab the attention and eyeballs of your audience? Use these cool video effects in your videos and make them look amazing
Read More
Get A Custom Quote Now
Copyright © Buzzflick 2026, All Rights Reserved.
Get Video Animation at Reasonable Prices at BuzzFlick! Get A Quote!